Tuesday, May 29, 2012

Crayon Roll

I've been wanting to make one of these crayon rolls ever since I first saw them on the web 2 years ago. Now that my daughter Buni is really into drawing I thought this would be perfect thing to make for her so she can color when we are out and about.
The web is chock full of tutorials on how to make crayon rolls. Just GOOGLE crayon roll tutorials and whole bunch of tutorials will pop up. I got the idea to make mine from reading a tutorial on how to make a purse organizer. My crayon roll is 12 inches wide by 5 inches tall and holds twelve crayons. The fabric I used are two fat quarters I got on sale at Joanns. The acorn fabric is an old Michael Miller design.
Front View
I didn't take a picture of it, but the top half of the crayon roll folds down to cover the crayons and keep them from falling out.
Back View
If you have questions on how I made this than leave me a comment. Happy sewing.


Sunday, May 27, 2012

Stitch Diaries & Sewing Feet

During my hiatus I celebrated my birthday by purchasing some (Distinctive brand) sewing feet from Amazon.


As soon as I got my sewing feet I started to try them out and realized that I needed a way to document the settings that I used on my sewing machine since each foot requires different settings. I also thought it would be useful to have something visual regarding what type of stitching each foot did. Thus my stitch diary was born. My mom told me that they made a similar stitch diary back in High School when she still lived in the Philippines except all the stitches were hand stitched.I initially purchased a SMASH book like the one pictured to act as a mini scrap book, but realized that it is also the perfect size for a stitch diary.


As you can see I sewed on scrap fabric using the various sewing feet I purchased, taped them to my SMASH book with some washi tape and recorded the settings I used.


The edge joining foot on bottom left was a personal favorite. I also loved the ruffler, but have yet to try it on a real project. The narrow hem foot on the top left wasn't my favorite since it took forever to figure out how to use it properly and even then the results weren't very good.


Do you see the button and button hole on the right? That was the first time I sewed a button and buttonhole. So easy after I read the instructions for the one step button hole for my sewing machine. I can't believe I was so afraid to use it. Now I need to find the perfect project to use it on.


The side cutter overlock foot on the left was kind of like having a serger foot for your sewing machine. The side cutter overlock foot cut and overlocked at the same time. Also the picot foot was very similar to the overcast foot so I wasn't too impressed with. Still trying to get my head around all the different kinds of feet. I still have to try my bias tape foot and my pintuck foot. Hopefully I'll be adding more entries into my stitch diary real soon.

If you are interested in the sewing feet I used than do a search for "Distinctive Sewing Feet" on Amazon. The prices are very reasonable. The home decorator kit and the kit with various hemming feet were $50 each. The feet are for low shank sewing machine that can snap on and off. The feet worked for my Brother sewing machine so double check before you purchase it. Happy sewing.

Wednesday, May 23, 2012

School Bags and Such

Sorry for my absence. I've been busy, busy, busy with lots of birthdays, first day of schools and being just plain lazy. Luckily I've been sewing for most of my absence with most of my sewing being centered around making things for my little three year old: Buni.


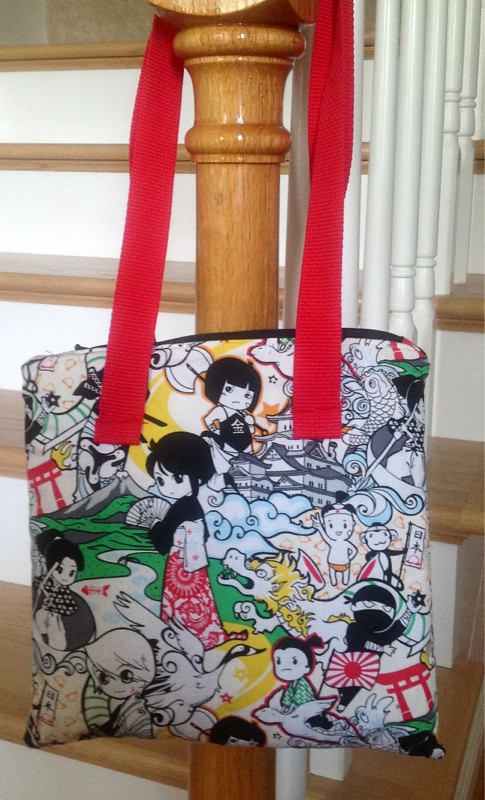
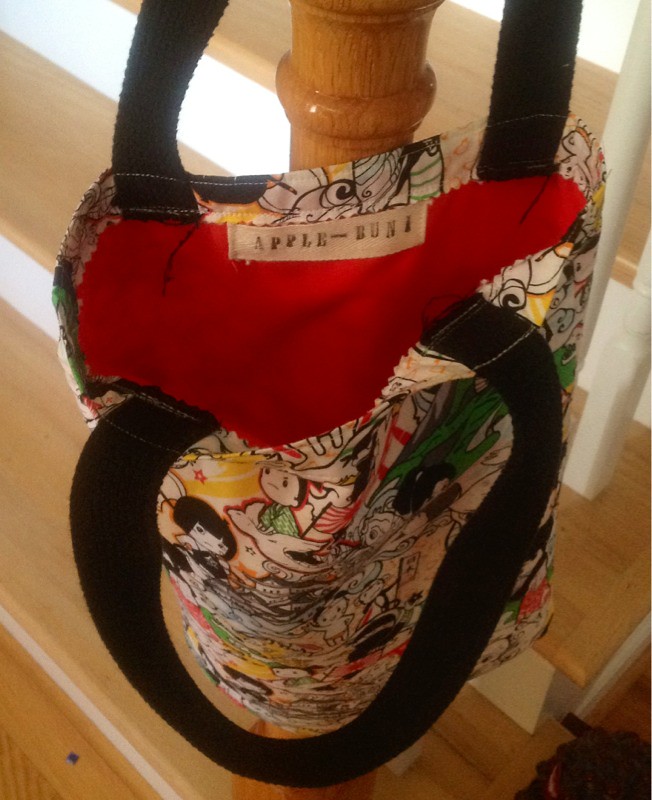
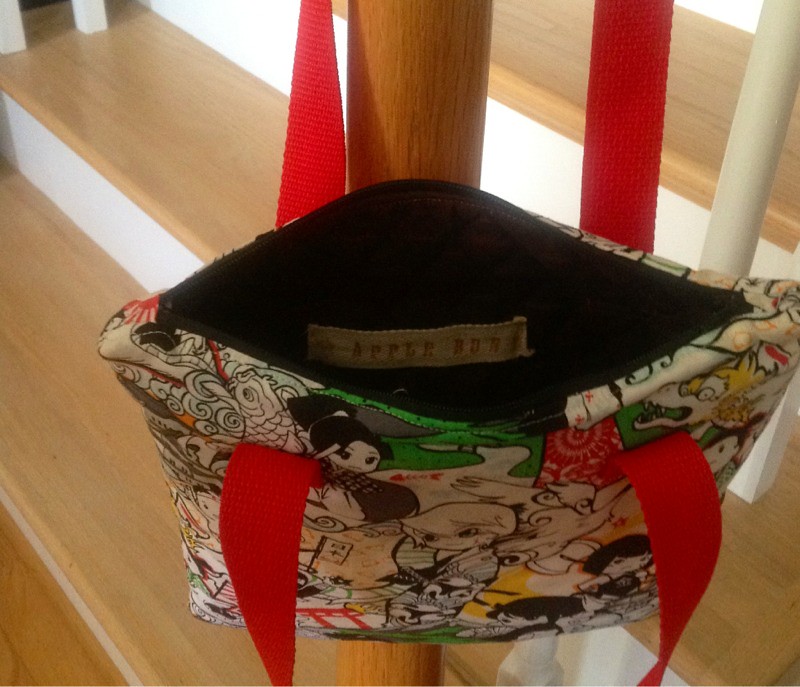
The fabric is called Momotaro and it came from Kawaii Fabric on Etsy. I used red cotton for the lining and black cotton webbing for the straps. You can also see my sad attempt at making labels using twill tape, fabric stamp pad and stamps.


Buni just started pre-school in March and I decided several weeks later that she needed a school bag to bring all her school things: clothes, snacks, art work, etc. Unfortunately, I didn't really measure her while I made the first bag so it ended up too long in both the straps and the bag itself. Lets just say she wears the straps around her neck instead of on her arms. The bag fits me perfectly, but I was thinking about Buni when I was making it. Seriously I was!


The second version of her school bag was smaller and zippered, but ended up too small to fit anything school related. Luckily it fits her Leap Pad perfectly, but I still had to go back to the drawing board to figure out how to make a bag she can use.


Zippered tote bag version with red polyester webbing for straps. The picture doesn't do a good job of showing my lining, but it's brown pre-quilted fabric from my mom's fabric stash. Don't recommend using pre-quilted fabric for a lining as its really bulky.


Another Apple-Buni tag that I made.


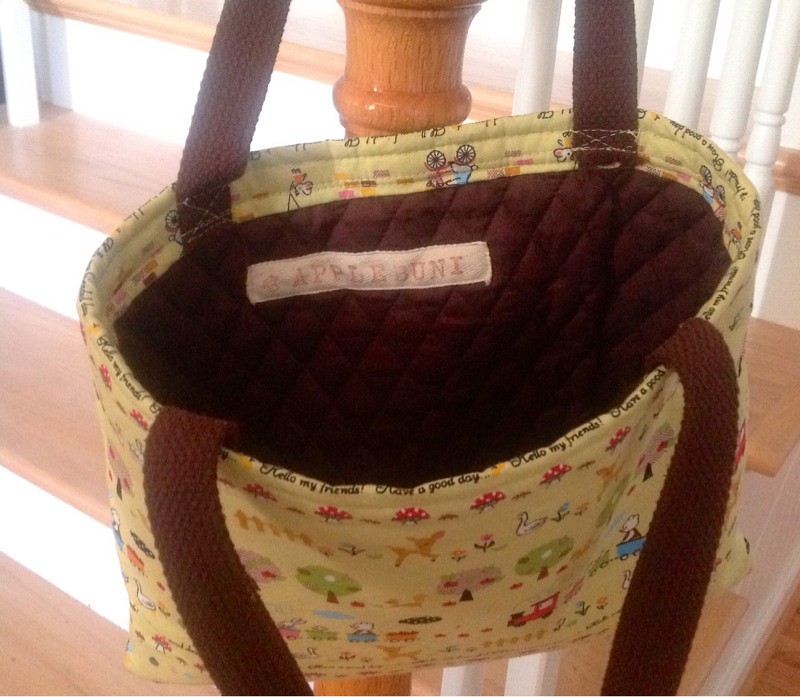
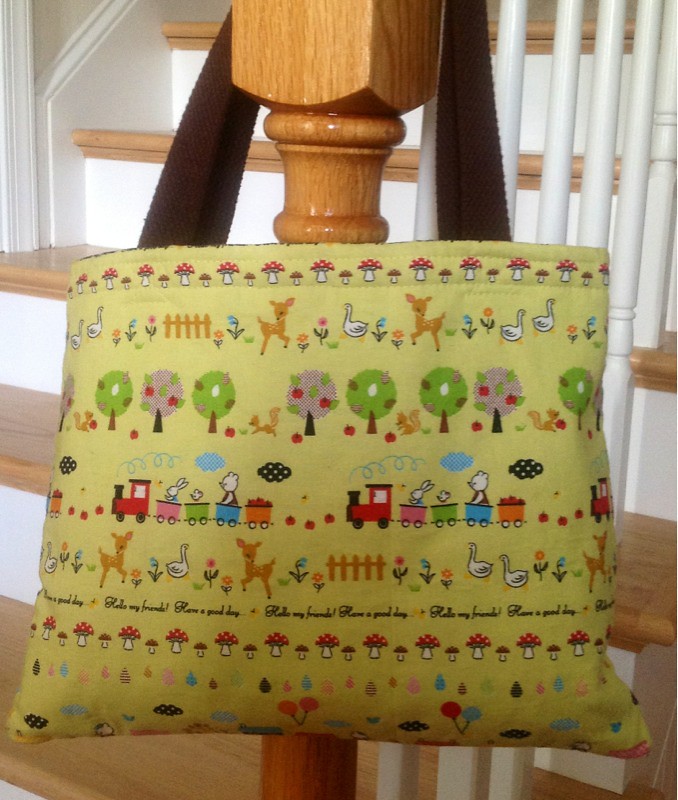
The third version of her bag fit her perfectly. Thank gawd. This will teach me to measure her first before making any future bags. Fabric was a Japanese cotton from Kawaii Fabric and the straps were brown cotton webbing from Joanns.


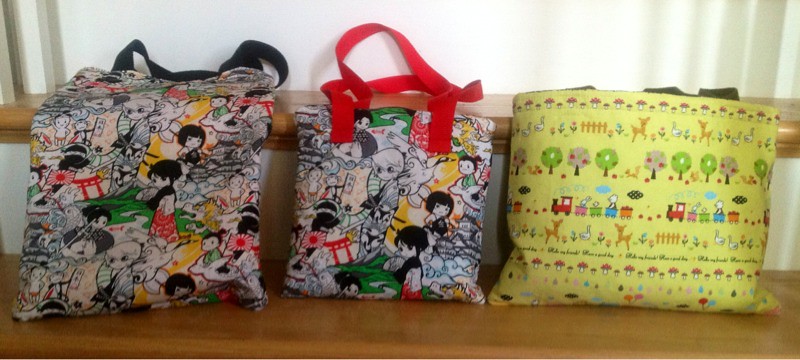
Here's a glimpse of all three bags from Buni's Spring pre-school bag collection. I'm sure I'll be making more bags this coming fall semester.


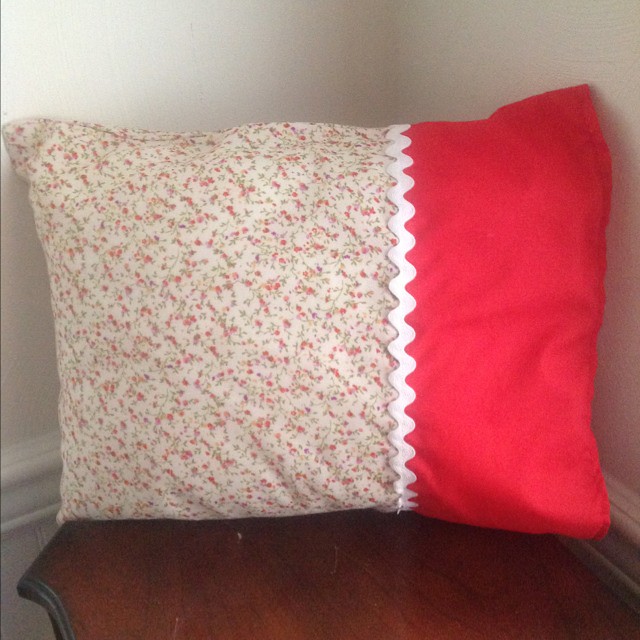
Another little project I had finished recently for her was a pillow case cover for a small pillow that I bought from Joann's over a year ago. Yeah I know. I am a major procrastinator. I am trying harder to not let projects sit there. I kind of winged it when I made the pillow case cover. Measuring the length, width and adding an inch to each measurement. Than I decided that the pattern was too busy so I added a solid color panel and some ric rac. I'm just glad that in the end that the pillowcase fit. Floral fabric and red fabric were both from Fabric Mart and vintage jumbo white ric rac was from eBay.

Stay tuned for more past projects and hopefully some present projects.